How to add a genome from Phytozome or JGI
From CoGepedia
One question we get frequently is how to add data from other genome repositories. This tutorial is for JGI, but should work for most places.
Instructions to load data
- Go to JGI/Phytozome
- Go to the download section for your genome of interest
- Select and download the assembly (fasta) and annotations (GFF)
- Note: Select the gff file that contains both genes and exons "xxx.genes_exons.gff.gz"
- Once downloaded, you can send these files to your iPlant Data Store and put them into the coge_data directory (to which CoGe has access), or you can upload them from your desktop. We recommend using the iPlant Data Store due to its more robust file transfer methods. However, your desktop should be fine as long as you have a decent bandwidth.
- Log into CoGe
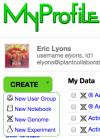
- Go to your user profile page
- Press "Create" and select "New Genome"
- This will take you to LoadGenome (or a popup in your profile for LoadGenome
- Fill out the necessary information about the genome.
- Note: I like to keep a newly load genome private until I had a chance to make sure the data loaded correctly. Then I make it public.
- Note: You can add a link to the data file. Unfortunately, JGI's download is behind an API so a directly link cannot be generated.
- Add (upload) the assembly in fasta format.
- Press the red "Load Genome" button located at the bottom of the data selections
- A popup will appear stating that your genome is being loaded
- When the genome has been loaded successfully, you'll get a thumbs-up and a link to go to GenomeInfo
- GenomeInfo will appear in a popup in your profile page or in a new window. GenomeInfo lets you get detailed information about your genome, manage data about the genome, send it to CoGe's analysis tools, and associate new data to the genome.
- To add structural annotations to your genome, press "Load Gene Annotations"
- This will popup (or a load new window) of LoadExperiment.
- LoadExperiment will ask you to add information about your genome and to upload a GFF file for the annotations.
- Add information about the annotation file and add your GFF file
- Note: the gff file can be compressed in gzip
- Press the red "Load Annotation" button to start loading the annotations
- Note: Loading these annotations may take a while
- You will get a thumbs up when the loading is complete and successful
Loading Complete
Testing and making the genome public
Time to make sure that the genome and annotations loaded correct before making the genome public
- Go to GenomeInfo for your newly loaded genome
- Check that there are sequences loaded by looking at the statistics for the genome
- Check that the annotations loaded correctly by clicking "Click for features" under features
- Visualize the genome by pressing "View". This will launch GenomeView
- The genome should have gene models. You may need to zoom out and scroll along the genome to see them.
- Check gene models by extracting protein coding features ([CDS])
- Move to a region with several gene models
- Move the mouse to the feature track title/name ("Features: all")
- Press the down arrow that appears when the mouse is on the feature track name
- Select "Send to FeatList". FeatList will extract the features from the genomic region and display them to you in a list
- Features are automatically sent to FeatList
- In FeatList, check the checkbox for all the CDS features
- There is an option in the menu at below the feature list to do this
- Select "FASTA Sequences" for where to send the features to
- Press the green "Go" Button
- Features are sent to FastaView
- In FastaView, the sequences are shown as DNA sequences
- To test to see if the CDS features were loaded properly, press "Protein" to translate the DNA sequence to amino acid sequence
- When the translated sequences are returned, there is a count at the top that shows the number of sequences and the number of features. If CoGe can determine the correct reading frame, only one sequence will be returned (the correct translation). If CoGe can't determine the correct reading frame, all 6 translated reading frames will be returned. If every sequence translated correctly, the number of sequence will equal the number of features. If any sequence was translated into all 6 reading frames, there will be more sequences than features.
- All sequences translated correctly
- Additional testing
- I sometimes run a synmap analysis using the new genome and a related genome. Since I know what to expect from the results, it is another way to check if the genome was loaded properly.
=Make your genome public!
Once the genome load has been validated, it is time to make it public
- Return to GenomeInfo
- Press "Edit Info" under the info box
- Deselect "Restricted"
- Press the green "Update" button to save.
- The genome is now public.


